Step 1
Open DJI Terra and find your photogrammetry project. Make sure that the 3D model was generated in B3DM output file format.
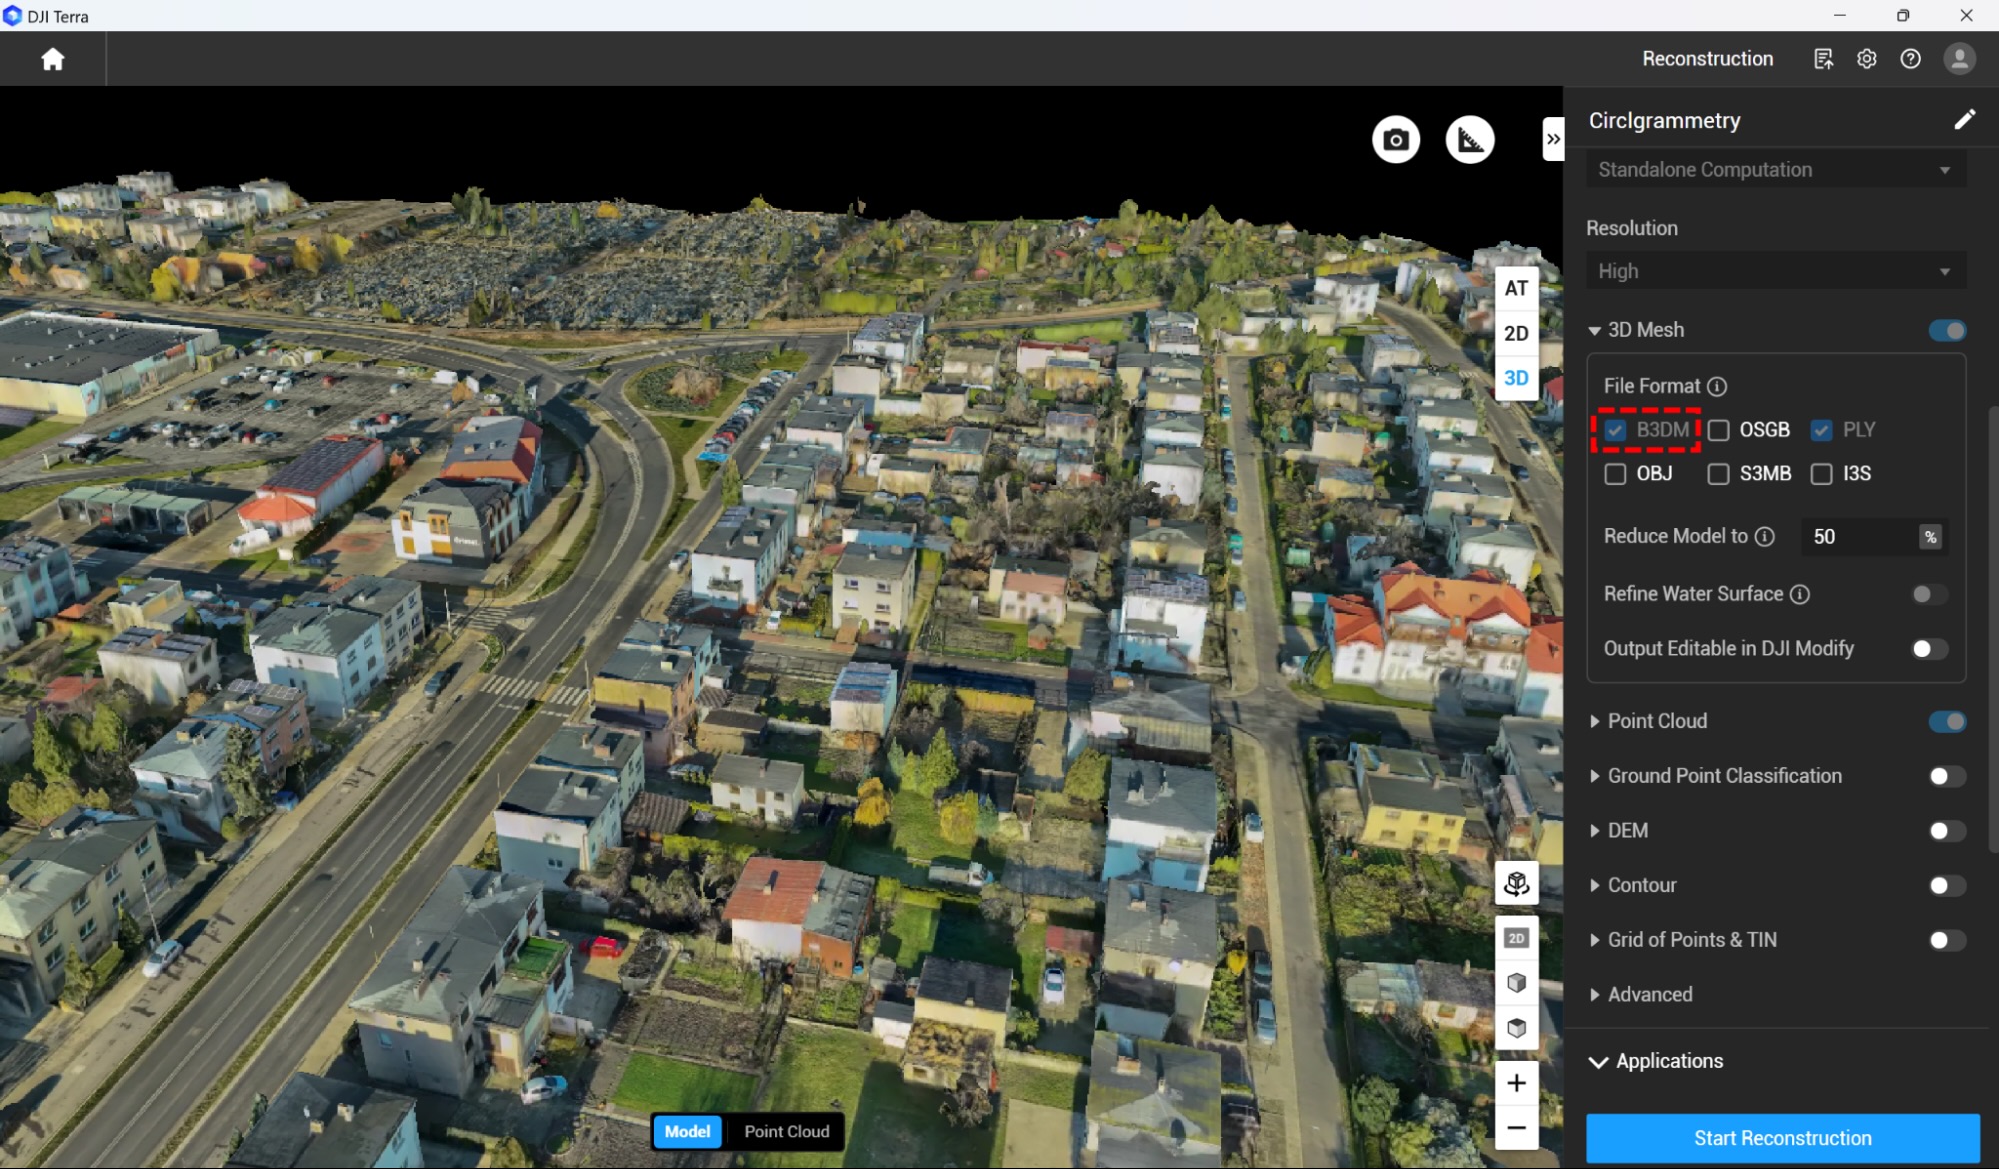
After checking the output format, return back to the DJI Terra home screen with the project list and find the project in the list.
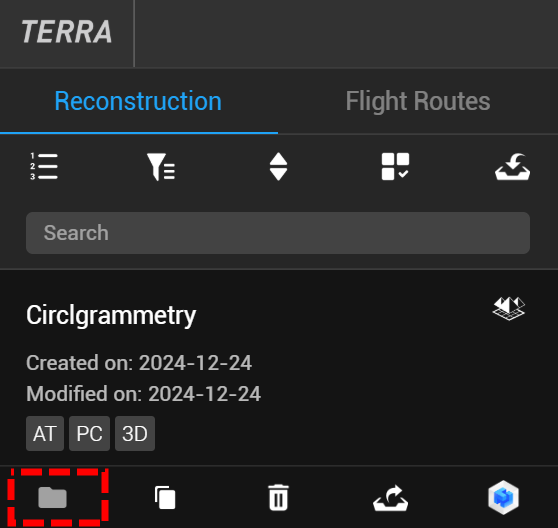
Then press the button which opens the output project folder.
Step 2
In the opened windows explorer window proceed to the folder: <account_name>/<project_name>/models/pc/0/terra_b3dms folder.

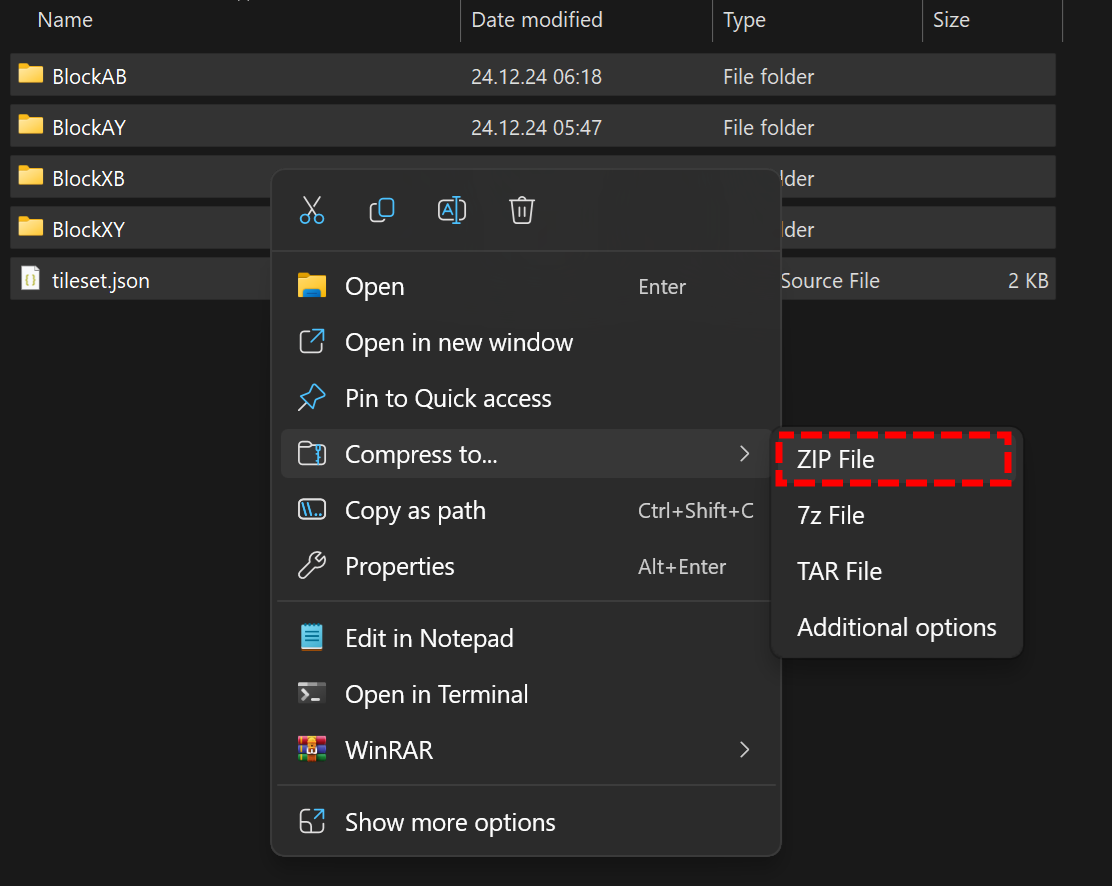
One of the indicators that you are in a correct folder is the presence of the tileset.json file.
Step 3
Select all sub-folders and files in the folder and make a zip archive.
Step 4
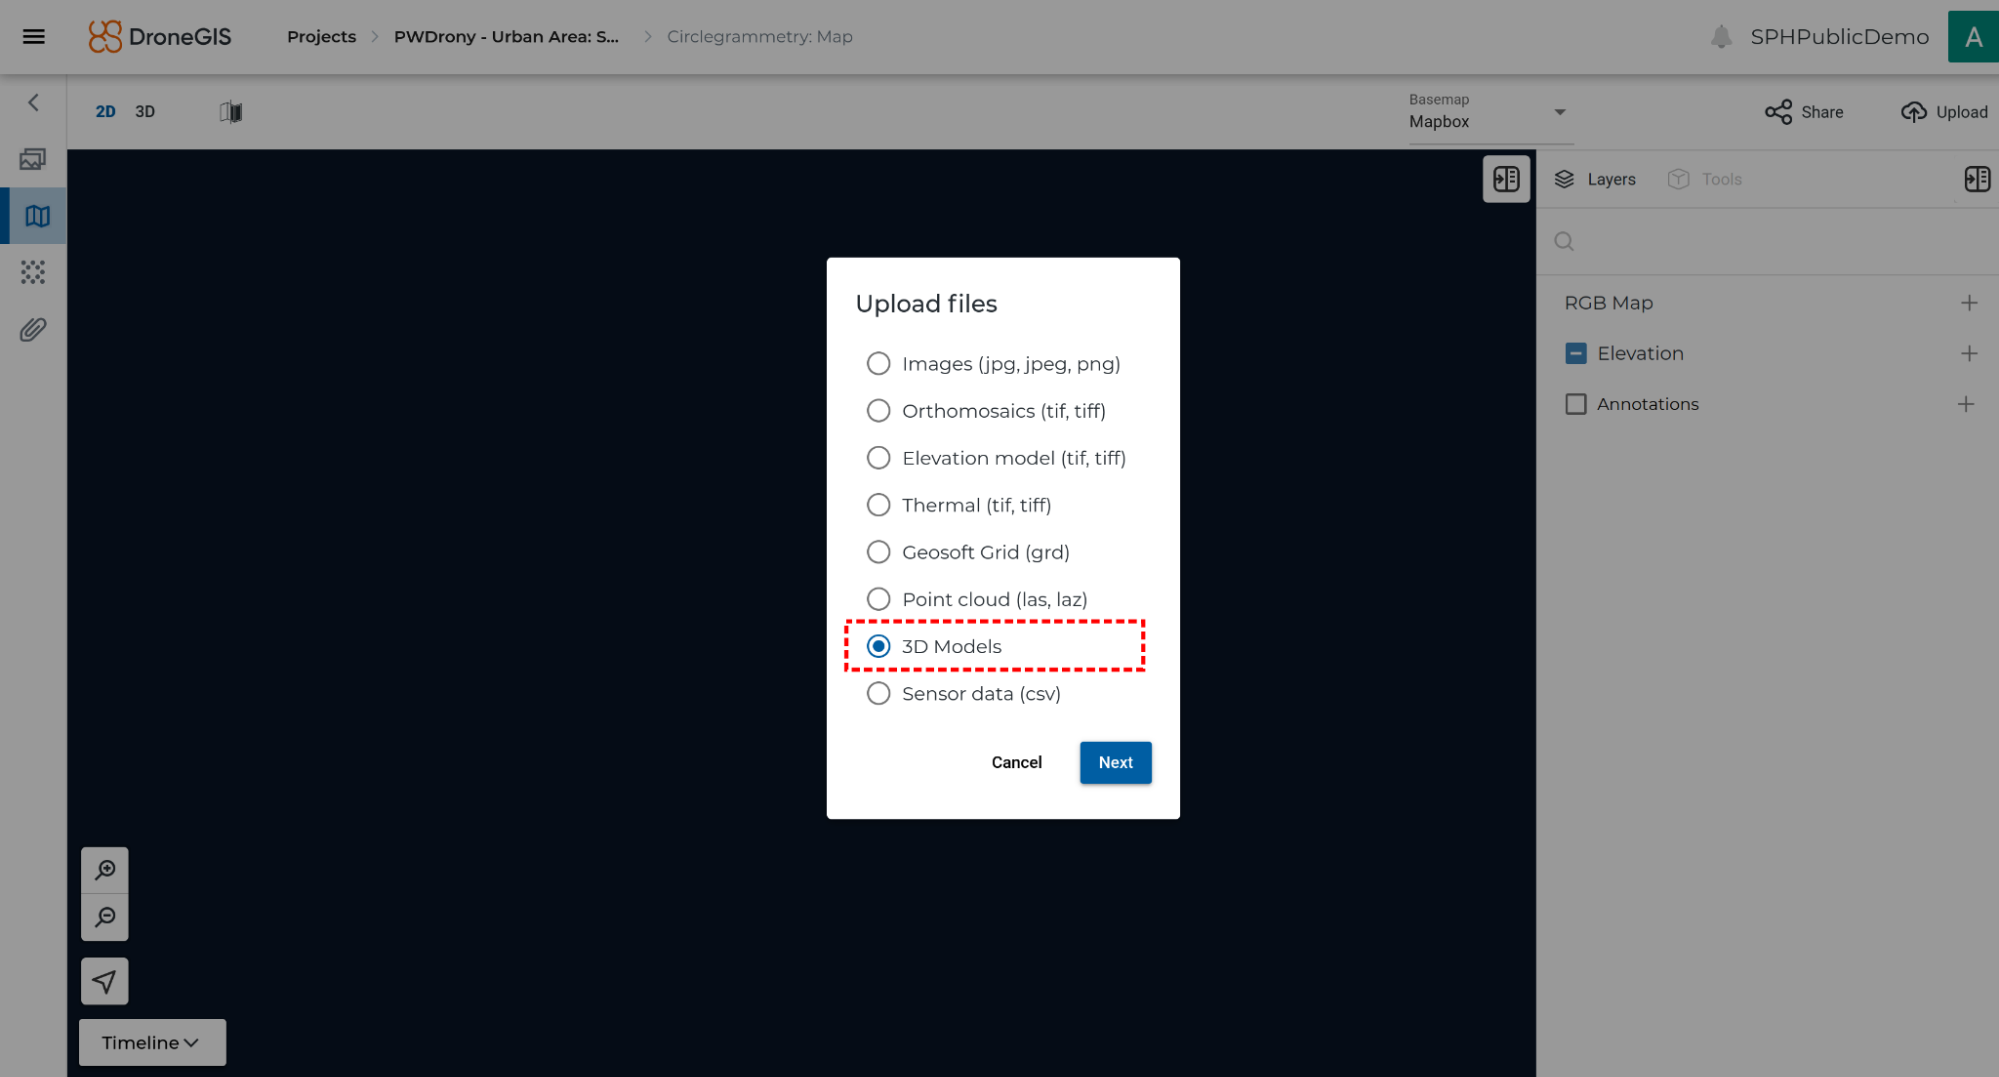
Open the DroneGIS project and survey where you want to upload a 3D model. In the upload dialog select “3D model”
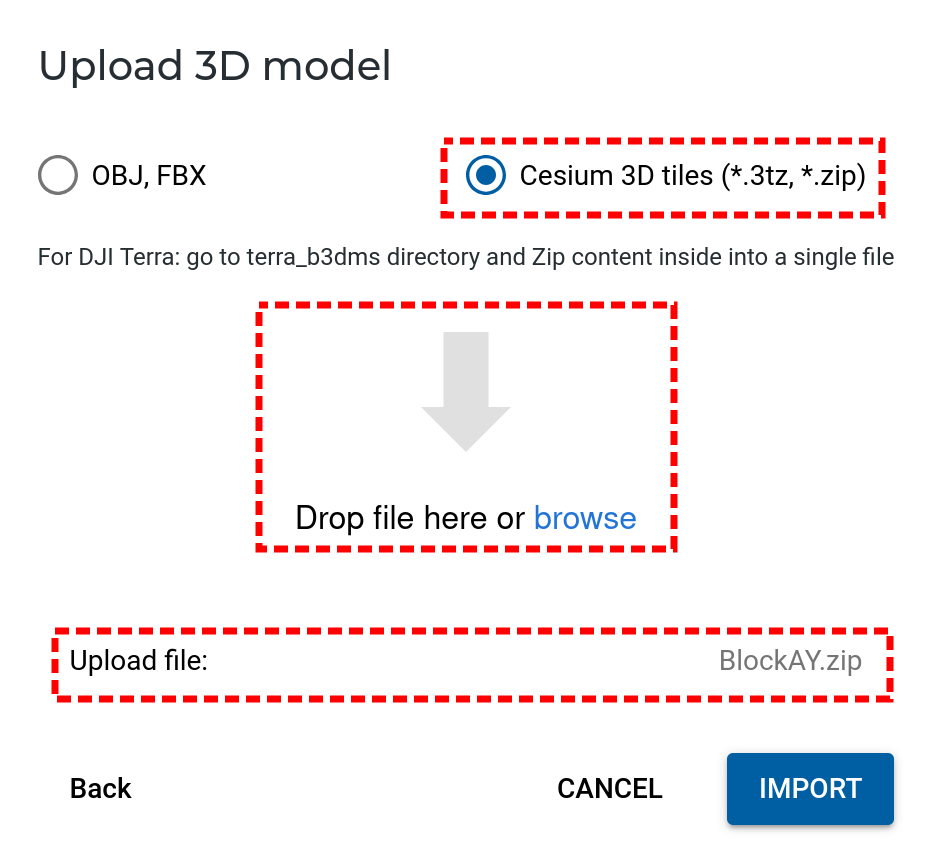
Then on the next step, select “Cesium 3D tiles”, select the prepared earlier ZIP archive and press “Import”.
Step 5
Uploading and processing may take a while. When the process is finished, a notification email is being sent.
If all goes well the model should appear in the 3D view of the screen. Sometimes the map shows a 2D view by default, in this case simply click on the 3D view. The 3D model should appear on the screen and in the layers panel.
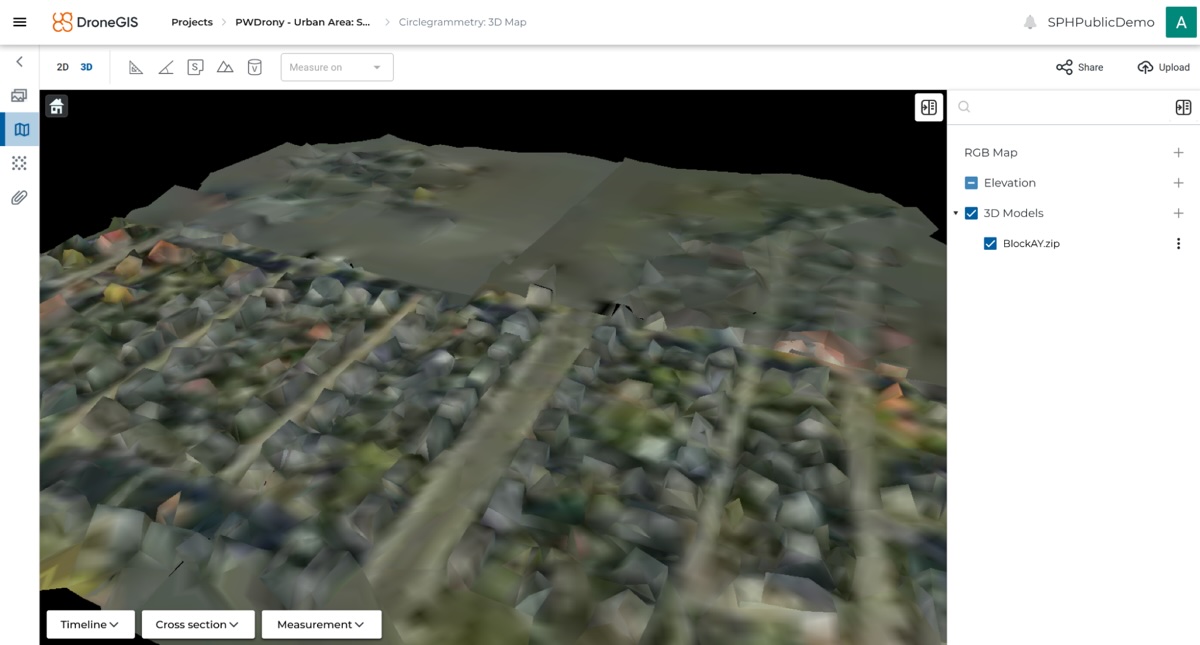
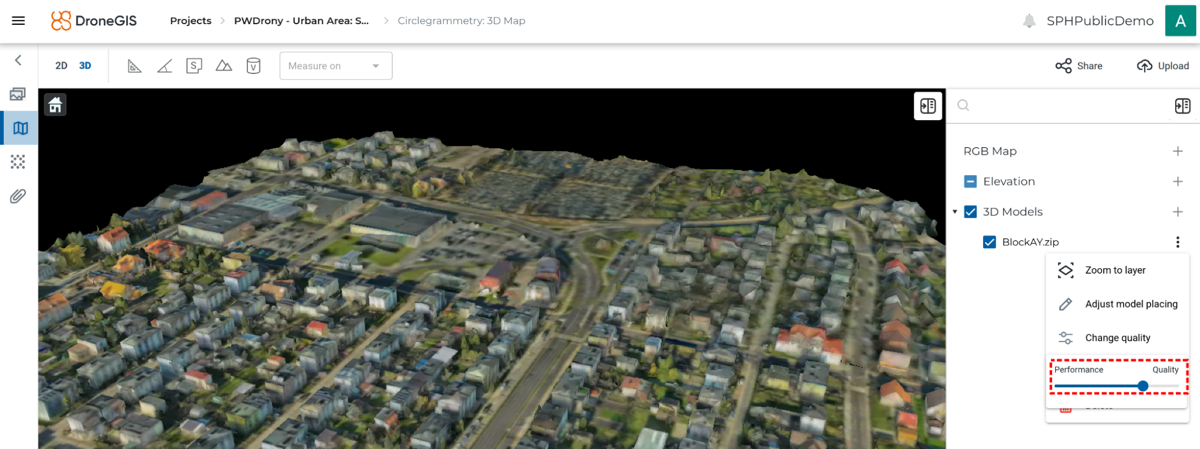
What If the model looks blurry by default? Different photogrammetry software generate 3D tiles pyramids differently which may affect the way how it’s being rendered. Rendering big 3D models is always a trade-off between the amount of data which should be loaded and the model level of detail.
To overcome this issue DroneGIS has the “Change quality” tool which helps users to find a proper balance between amount of data loaded and the level of detail.
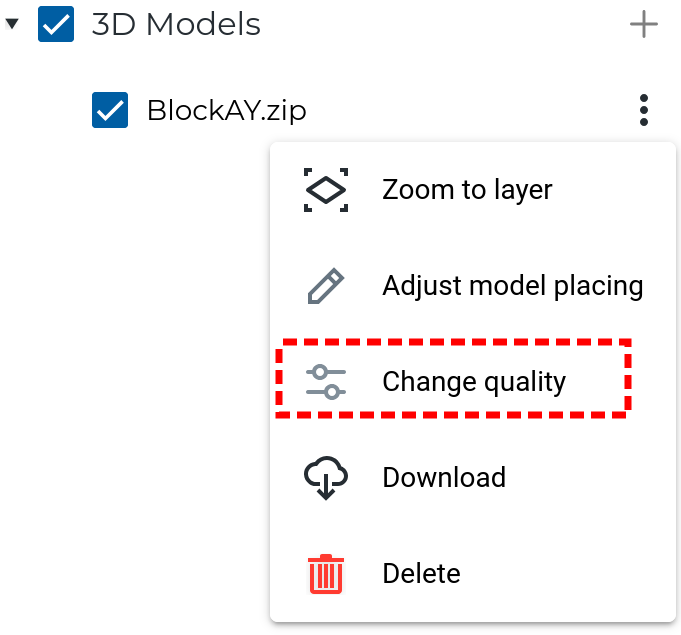
Adjust the slider position and in parallel check how the model is changing on the map.
