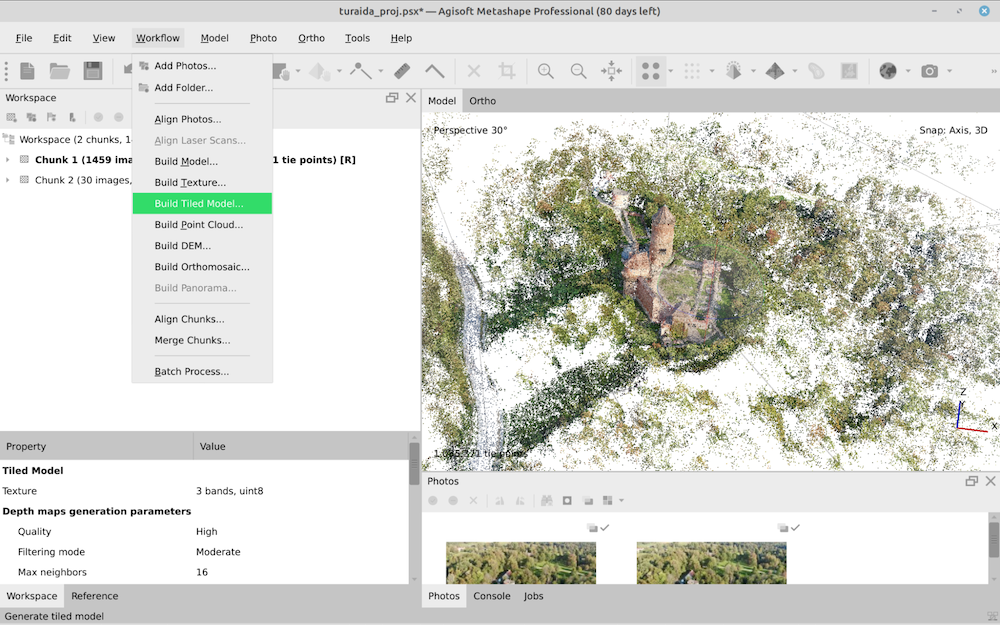
Step 1
Assuming that cameras are properly aligned, build tiled model in Agisoft Metashape
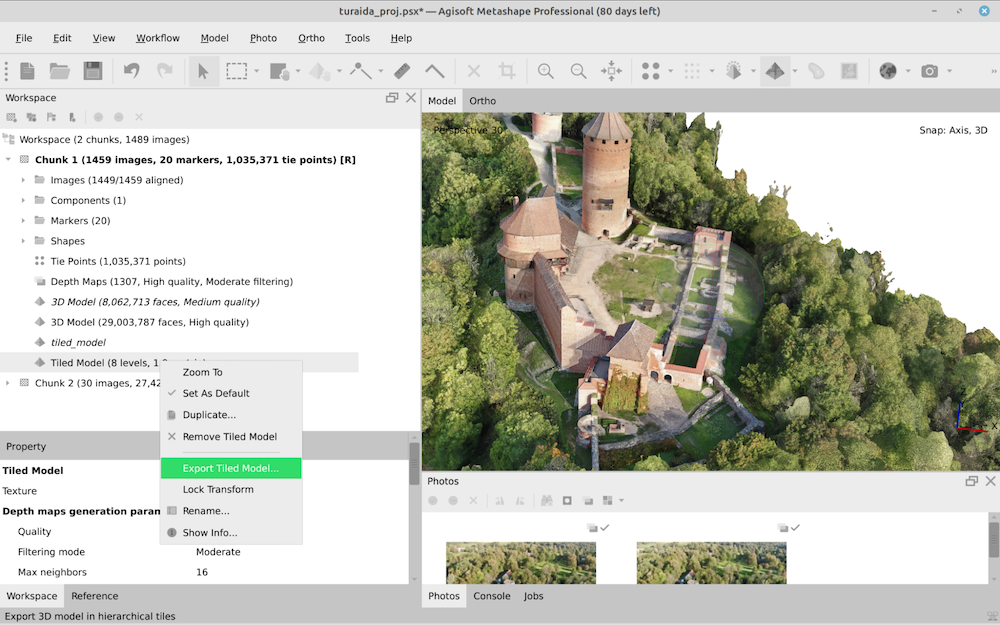
Step 2
When the model is ready, open model context menu and click Export Tiled model
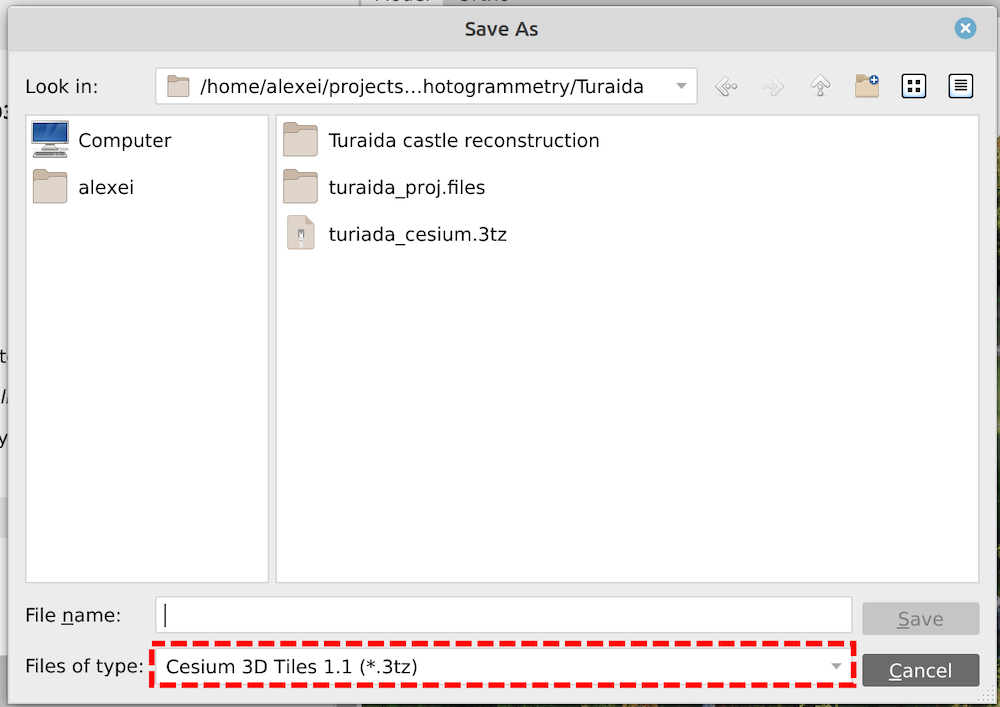
Step 3
In the pop-up window, select Cesium 3D tiles 1.1 as an output format and enter the file name. After export you’ll get a file with .3tx extension.
Step 4
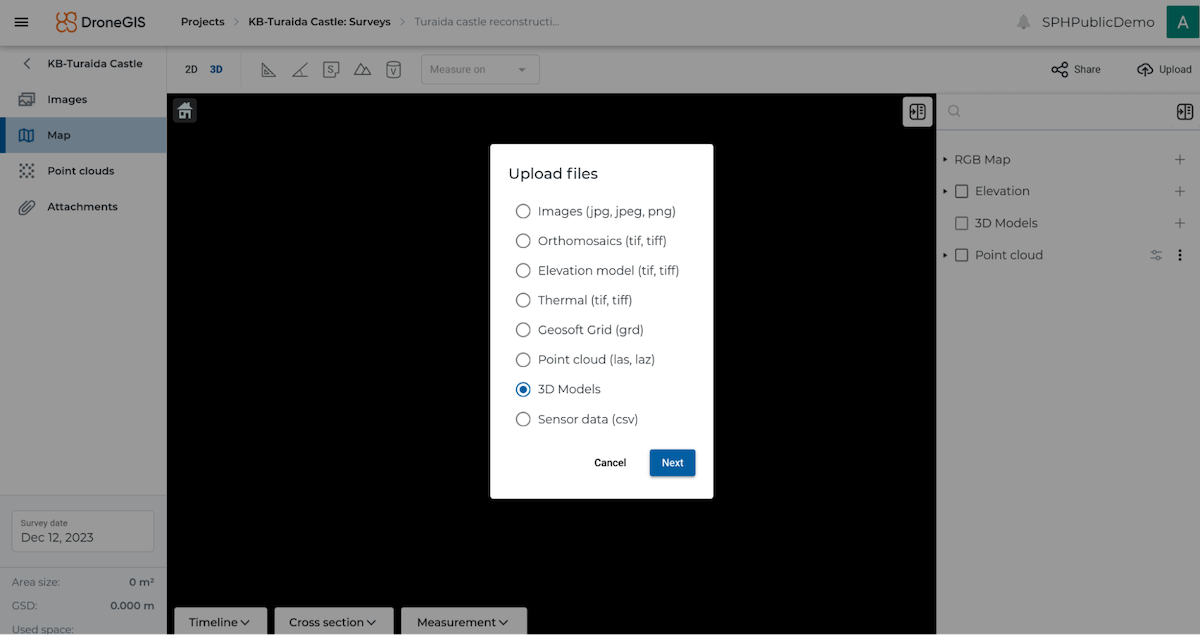
Open your DroneGIS account and proceed to the target project and survey. Then press Upload. In the dialog box select 3D Models
Step 5
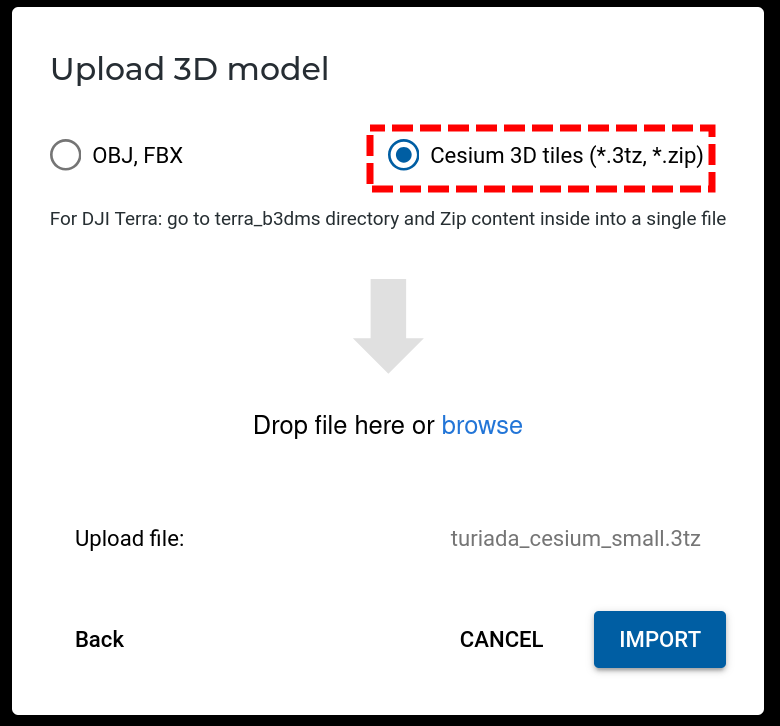
In the pop-up window select Cesium 3D tiles option and previously exported .3tz file. Then press Import.
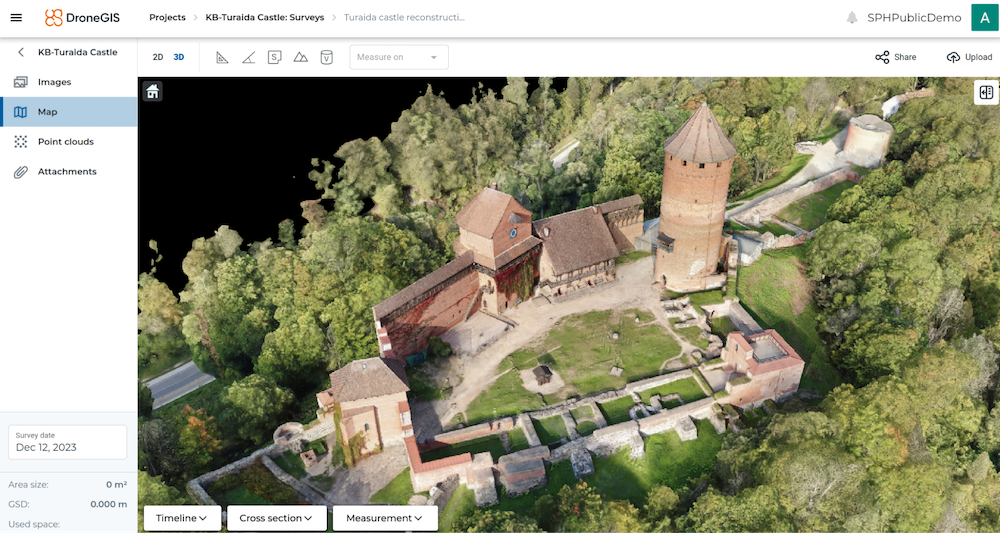
After importing, if all goes well, your 3D model should be displayed, like this example of 3D model in DroneGIS.